Total Pageviews
2010/02/28
2010/02/19
Apply AutoComplete component in Flex
Go to here to download AutoComplete Component: http://hillelcoren.com/flex-autocomplete/
Here has its demo: http://web.me.com/hillelcoren/Site/Demo.html
After you download its zip file, extract it and you can find out AdvancedAutoComplete-1.0.swc in bin directory.
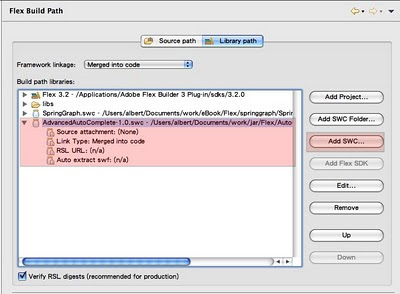
Add SWC file into Flex Build Path
This value object contains three attributes, including name, gender and mail.
package vo{public class People{public function People(iName:String, iGender:String, iMail:String){name = iName;gender = iGender;mail = iMail;}public var name:String;public var gender:String;public var mail:String;
}}
Create a new MXML Application file, which called "AutocompleteTest".
Click "Finish"
<?xml version="1.0" encoding="utf-8"?><mx:Application xmlns:mx="http://www.adobe.com/2006/mxml" xmlns:components="com.hillelcoren.components.*"layout="absolute" ></mx:Application>
Declare an ArrayCollection variable for AutoComplete component as its data provider.
And add value object, People, into this ArrayCollection as page load.
Use AutoComplete tag to realize auto complete function.
<?xml version="1.0" encoding="utf-8"?><mx:Application xmlns:mx="http://www.adobe.com/2006/mxml" xmlns:components="com.hillelcoren.components.*"layout="absolute" initialize="init()"><mx:Script><![CDATA[import vo.People;import mx.collections.ArrayCollection;
//declare an ArrayCollection as AutoComplete component's data provider[Bindable]private var peopleList:ArrayCollection = new ArrayCollection();
//set data into people list as page loadprivate function init():void{peopleList.addItem(new People("Albert", "Male", "albert@gmail.com"));peopleList.addItem(new People("Mandy", "Female", "mandy@gmail.com"));peopleList.addItem(new People("Verio", "Male", "verio@gmail.com"));peopleList.addItem(new People("Richard", "Male", "richard@gmail.com"));peopleList.addItem(new People("Andrew", "Male", "andrew@gmail.com"));}]]></mx:Script><mx:HBox><mx:Label text="Name" /><components:AutoComplete id="autoComplete" labelField="name" dataProvider="{peopleList}" /></mx:HBox></mx:Application>
Labels:
Flex
2010/02/05
Building The SpringGraph Flex Component
Check out this SlideShare Presentation:
Building The SpringGraph Flex Component
View more presentations from Guo Albert.
2010/02/02
Integrate Flex With Spring Framework
Check out this SlideShare Presentation:
Integrate Flex With Spring Framework
View more presentations from Guo Albert.
2010/02/01
Access Net Web Services From Java
Check out this SlideShare Presentation:
Access Net Web Services From Java
View more presentations from Guo Albert.
2010/01/29
Access .Net Web Services via Java Web Services Client
Scenario
Implementation Steps
Create a simple web service via Visual Studio 2008
1. Choose ASP.Net Web Srvice Application

2. Write a HelloWorld method which accept one String paramter, and will return "Hello~"+name.

As you run this asmx file, you will see this page:

If I filled in Albert and submit. I will get "Hello~Albert" in the next page.

You can use this link (http://localhost:3936/Service1.asmx?wsdl) to get its WSDL page.

Build Java client via Eclipse
1. Create a Dynamic Web Project

2. Given a project name and set target runtime. Click Next.

3. Click Next

4. Click Finish. Then you had finished the Dynamic Web Project creation.

5. Create a Web Service Client.

6. Fill in WSDL url link and click Next.

7. Click Finish.

8. Then Eclipse will create these Java classes automatically. (Except TestClient.java)

9. Create a standalone Java

10. Make good use of the proxy class which generate by eclipse automatically.

Run this Java class we mentioned above, you can see "helloMsg=Hello~Albert Guo" in your Eclipse console
Labels:
Web Services
2010/01/21
Flex Plug-in for Eclipse
Please go to here to download installation file: http://www.adobe.com/cfusion/entitlement/index.cfm?e=flex3email
you can see this download page:
Click the installation file, and you will see this welcome page
click Next
Select "I agree...." and click next
Click next
Choose your eclipse path
Click Next
Click Install
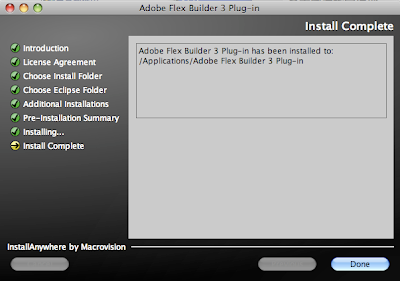
Click Done to finish your installation
Then open your eclipse, and you will see the Flex Builder option in your wizard. Click Next
Call this project as "FlexTest", and click next.
Click next.
Click next.
After FlexTest project had been created, you will see this project in your workspace.
In the FlexTest.mxml, we wrote a simple function to show "Hello Flex" message as user click the button.
DONE....
Labels:
Flex
2010/01/20
How many jar files you need to integrate Flex with Spring Framework + Hibernate?
Here is the list:
- backport-util-concurrent.jar
- cfgatewayadapter.jar
- cglib-nodep.jar
- cglib.jar
- commons-codec-1.3.jar
- commons-collections.jar
- commons-dbcp-1.2.2.jar
- commons-httpclient-3.0.1.jar
- commons-logging.jar
- commons-pool-1.5.4.jar
- concurrent.jar
- dom4j.jar
- flex-messaging-common.jar
- flex-messaging-core.jar
- flex-messaging-opt.jar
- flex-messaging-proxy.jar
- flex-messaging-remoting.jar
- hibernate3.jar
- jackson-core-lgpl-1.1.0.jar
- jackson-mapper-lgpl-1.1.0.jar
- jta.jar
- log4j.jar
- org.springframework.flex-1.0.1.RELEASE.jar
- slf4j-api.jar
- slf4j-log4j12.jar
- spring-beans.jar
- spring-web.jar
- spring-webmvc.jar
- spring.jar
- xalan.jar
Unable to locate Spring NamespaceHandler for XML schema namespace [http://www.springframework.org/schema/flex]
Problem
As I integrated flex with spring framework, I got this error message when I start apache tomcat:
1:  2010/1/20 下午 04:25:59 org.apache.catalina.core.ApplicationContext log
2:  資訊: Initializing Spring FrameworkServlet 'spring-flex'
3:  2010/1/20 下午 04:26:00 org.apache.catalina.core.ApplicationContext log
4:  嚴重的: StandardWrapper.Throwable
5:  org.springframework.beans.factory.parsing.BeanDefinitionParsingException: Configuration problem: Unable to locate Spring NamespaceHandler for XML schema namespace [http://www.springframework.org/schema/flex]
6:  Offending resource: ServletContext resource [/WEB-INF/flex-servlet-context.xml]
7:   at org.springframework.beans.factory.parsing.FailFastProblemReporter.error(FailFastProblemReporter.java:68)
8:   at org.springframework.beans.factory.parsing.ReaderContext.error(ReaderContext.java:85)
Solution
This error resulted from I forgot to copy flex-spring integration jar file into WebContent/WEB-INF/lib, you can go to here to download this jar file: http://www.springsource.org/spring-flex
2010/01/19
Setup BlazeDS on Tomcat with Flex Builder

1. download BlazeDS from http://opensource.adobe.com/wiki/display/blazeds/BlazeDS/
2. unzip file and extract BlazeDS.war
3. Create a new "Dynamic Web Project" in Flex Builder. Called it "blazeds-server"
define your context root, it will has relationship with step5
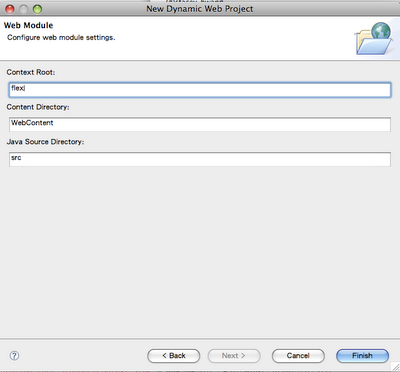
Ater creation, you can see your blazeds-server project had been created.
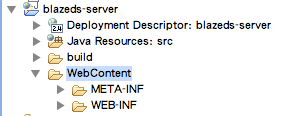
4. Now go back to the folder where you had extracted blazeds.war and import the META-INF and WEB-INF folders from there to the "Webcontent" folder that eclipse had created in the project.
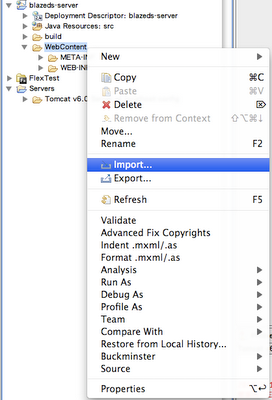
select file system
select all folders under blazeds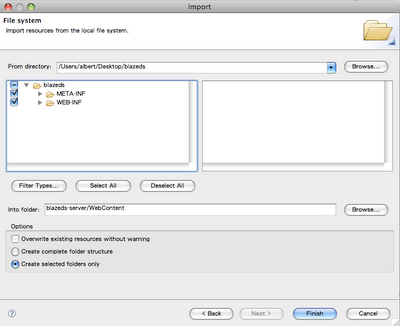
Just click "Yes to All" to overwrite all files
5. Open the services-config.xml file within WEB-INF/Flex folder and change entries
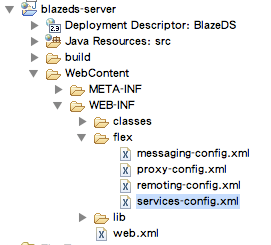
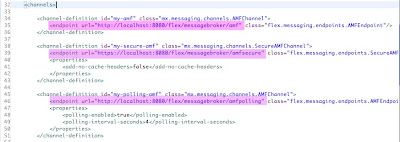
6. Now go back to the folder where you had extracted blazeds.war, set these jar files in WEB-INF/lib into your build path
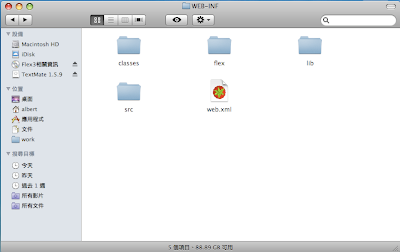
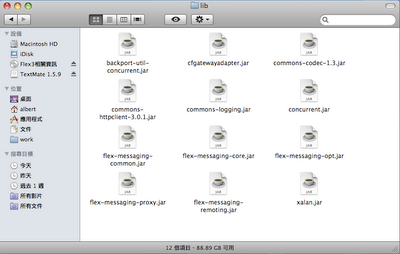
7. Build your project, and deploy to tomcat.
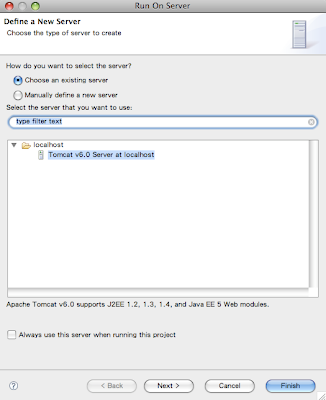
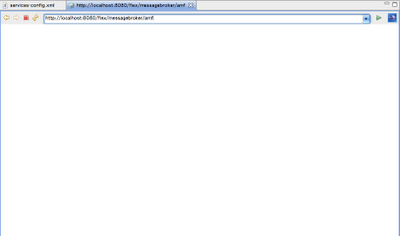
Verify your setup by testing if the amf links are active . Paste the endpoint url you changed on services.xml onto your browser. something like this http://localhost:8080/flex/messagebroker/amf should return you a blank page and not a 404 or 500 error.
8. create a simple java class
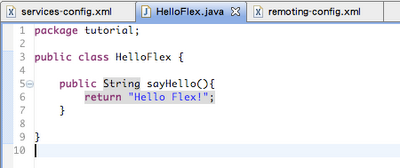
9. define this java class into remoting-config.xml
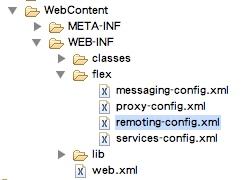
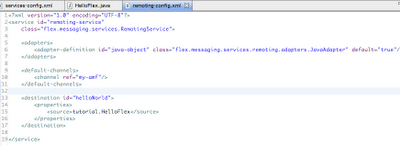
10. NewProject-Flex-select J2ee in application server type.Unselect "Create combined flex/java src folder".Click next
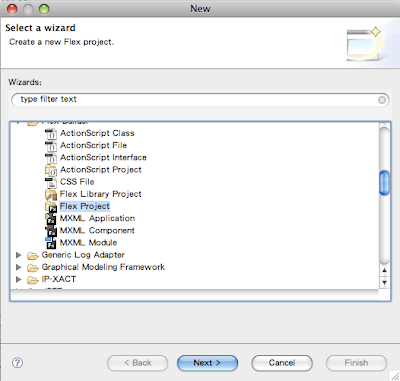
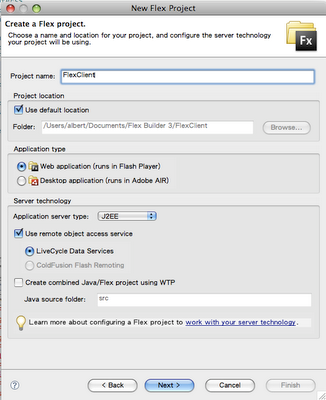
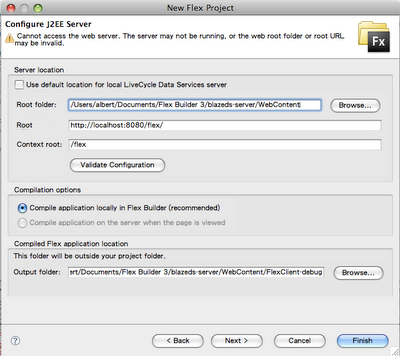
11. Deselect the "Use default location for LCDS " and enter the following.
RootFolder :{youreclipseworkspace}\flex\WebContent\
Root URL:http://localhost:8080/flex/
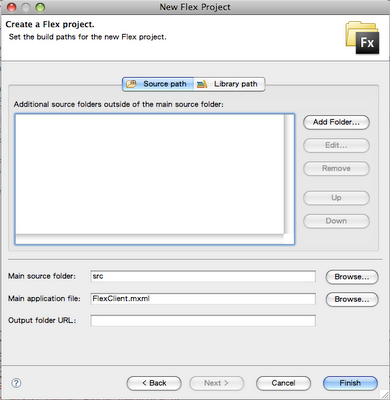
Context_Root:flex/. Click finish
12. Create a simple mxml
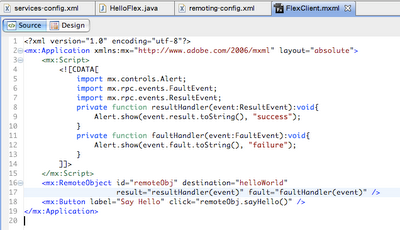
13. Build all and restart the server if its neccessary. RIght click on your mxml and select "Run as Flex application".
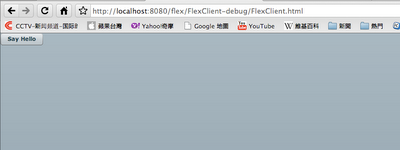
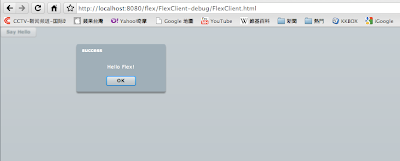
Click on the button. You should be getting a pleasant "Hello Flex!" from your server setup :-)
Subscribe to:
Comments (Atom)


